Google Chrome is possibly the most popular browser. There are memes and jokes that revolve around how Windows users use the inbuilt Edge browser only once – to download Chrome. Chrome has many amazing features such as extensions and an inbuilt password manager. But if you’ve worked with Chrome for long enough, you know it’s a resource-intensive tool. It consumes RAM and CPU, thus affecting the other processes.
You might have noticed other tools don’t perform the same when Chrome is active. This is because Chrome sucks up all the resources and other processes either freeze or crash. It can also make the system run slow. Or it can make the battery drain faster.
Resolve Chrome high CPU usage on Mac and Windows
If you’ve been noticing Chrome is consuming CPU too much, there are some simple fixes to resolve the issue.
1. Update Chrome
Since Google keeps adding more features to Chrome and fixes its bugs with each update, it’s best to keep the latest version. All you need to do is update your browser. Follow these steps to update Chrome:
- Open Chrome and click on the three dots on the upper right corner. Select Help.
- Visit About Google Chrome and see if there are any updates.
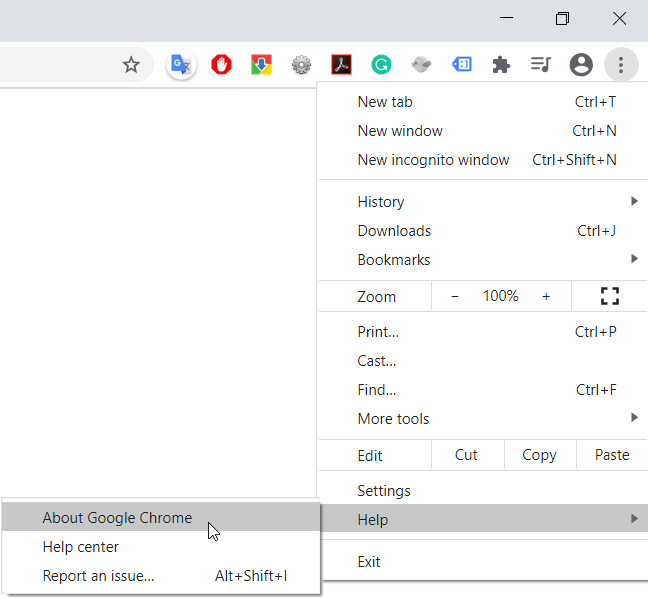
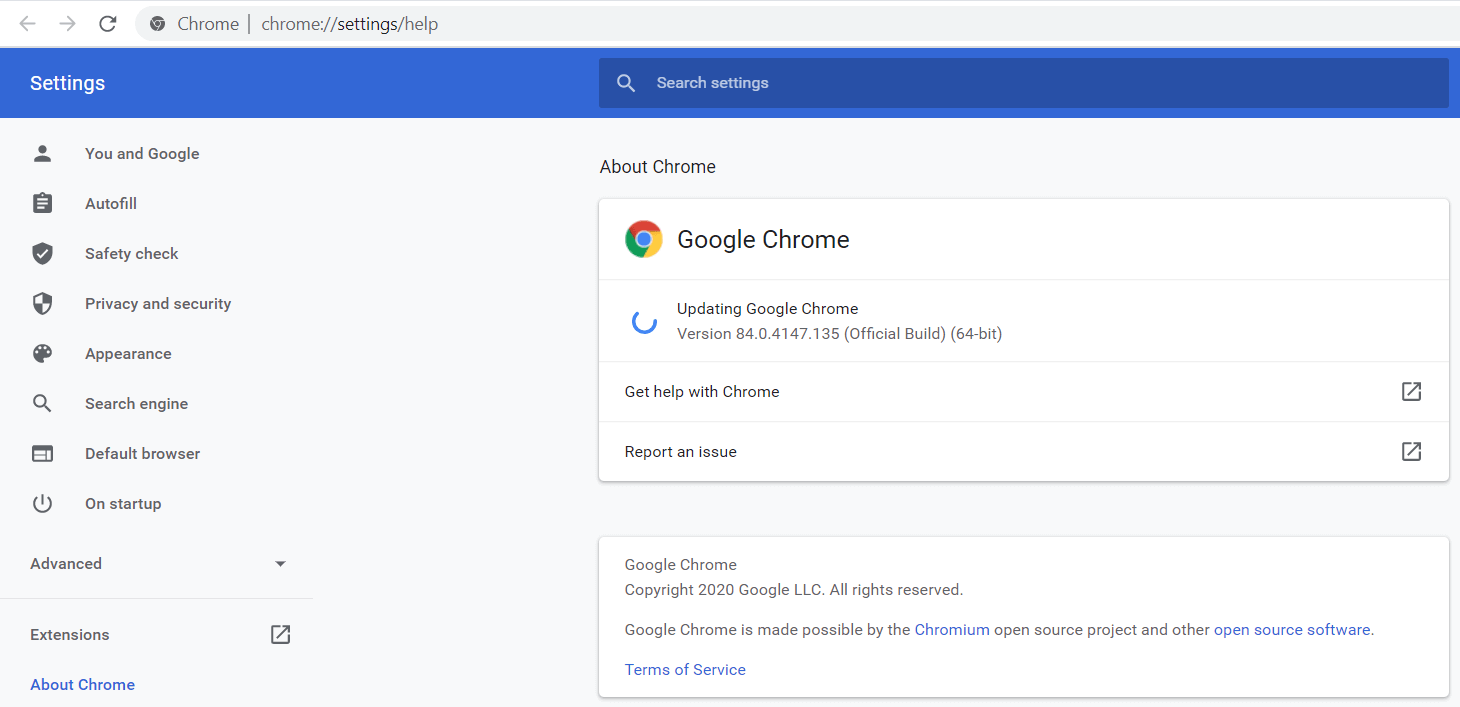
Chrome will install the updates on its own and you’ll get a cleaner version of the browser.
2. Don’t Open Too Many Tabs
The more tabs you’ll open, the more burden will be on the CPU and RAM. I’ve seen people who’ve opened 25-30 tabs on a single browser window! It’s disastrous and it gets even worse if you’re running heavy sites such as Netflix and YouTube that have scripts on them. Most of these tabs are often lying useless. When you see a tab is not in use, simply close it.

3. Disable unnecessary extensions
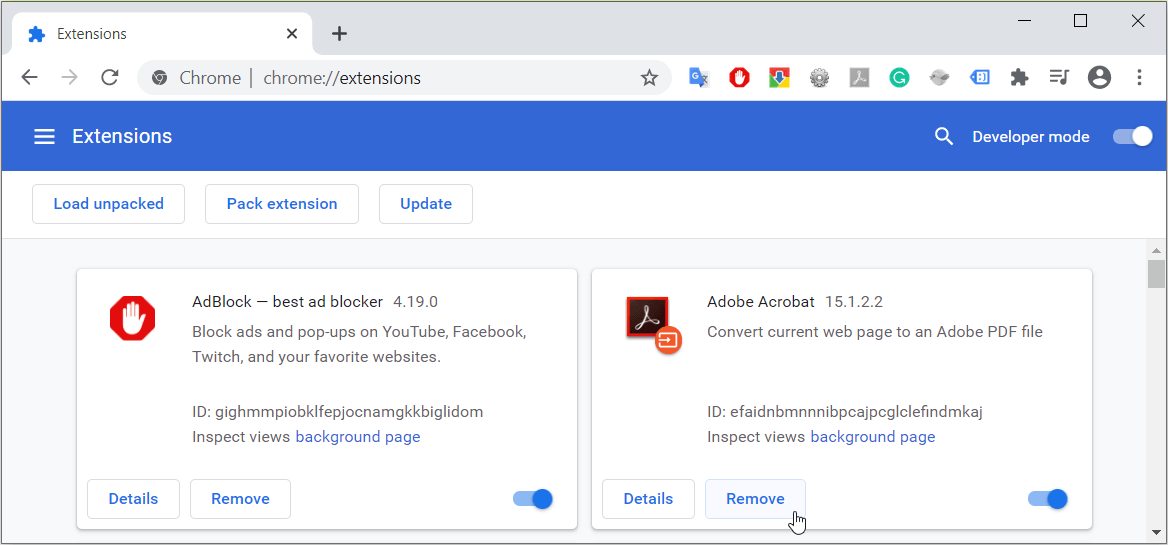
Chrome gives you many options in its app store. It’s easy to get carried away and install more extensions than you need. This will slow down the browser and Chrome will eat up more resources than usual. You can remove the unwanted extensions by typing chrome://extensions/ in the URL bar. You’ll find all the installed extensions here. Select the one you don’t need and right click on it and select Remove.
4. Check for malware
Yes, Chrome does use a lot of system resources but if the computer is slower than usual, it might be a virus or malware playing havoc. The presence of malware can slow down your browser and system. You won’t be able to clean the system yourself. You’ll need a good antivirus or malware cleanup tool for this. You can check for some free or paid tools for this.
5. Control CPU usage through Task Manager
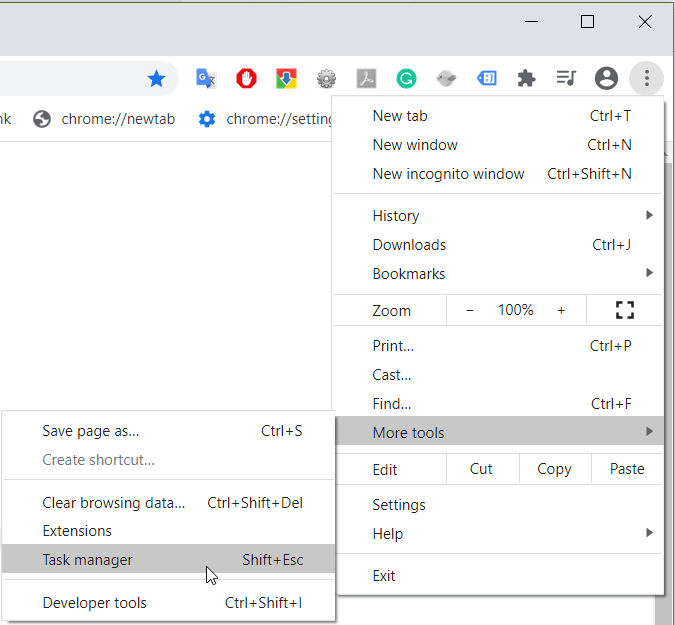
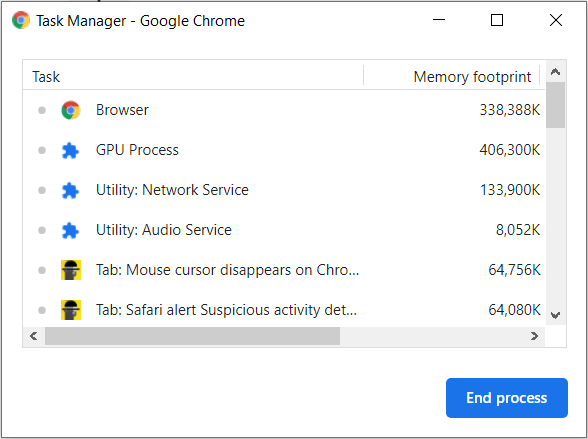
Just like Windows has a task manager, similarly, Chrome has a task manager too. You can use it to check the system resources that are being consumed by Chrome. To control the usage of resources by Chrome, you can follow these steps:
- Visit the Chrome menu and select More Tools.
- Open Task Manager from the options. You’ll be able to see CPU and memory usage by each tab.
- If you want to close a particular process, select it and click on End Process.
6. Reset Chrome settings
If you have too many extensions installed or have made certain tweaks that could have slowed down the browser, you can reset Chrome to its original settings. However, keep in mind that when you restore it to the default settings, you will lose cookies, bookmarks, and other personalization settings.
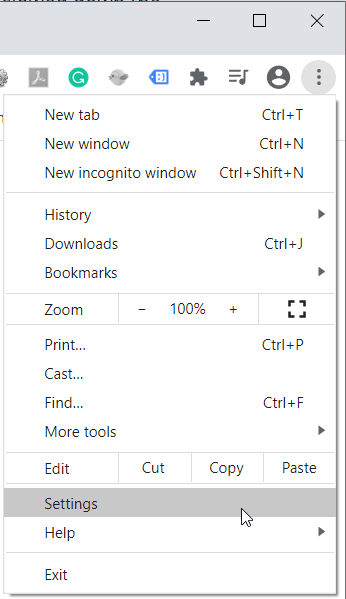
- Open Chrome and click on the three dots on the top right corner.
- Click on Settings and select Advanced.
- Scroll down and select the Reset Settings option.
- When you click on it, you’ll see a Reset button. Click on it to reset the browser to its default settings.

7. Toggle hardware acceleration
Hardware acceleration is available to speed up your browsing. It is enabled by default. While it is made to accelerate the processes, sometimes, it can end up consuming more CPU, thereby slowing down the system even more. Here’s how you can fix it.
- Go to the URL bar and type chrome://settings/ and press Enter.
- Click on Advanced.
- Check the status of Use Hardware Acceleration. Toggle its position.
- Restart Chrome and see if the problem is resolved.

8. Stop the background apps
Chrome will let you run background applications even if you have closed the browser. To stop those apps, follow these steps.
- Open chrome://settings/ and go to Advanced.
- Go to System and turn off Continue Running Background Apps.

Once the background apps are turned off, check if the browser has become faster.
9. Re-install Chrome
Maybe your Chrome wasn’t installed properly? Just in case if that’s the issue, you can uninstall and reinstall the browser. Sometimes, simple steps like these could work.

10. Use Chrome Clean up facility
Sometimes, malware can hide inside the browser and this can cause Chrome to use up extra CPU and memory. You can use the cleanup tool by Chrome to check if there’s a malware inside your browser. Here’s how you can use it on Windows.
- Open the URL chrome://settings/ and open Advanced settings.
- Select the option Clean up the computer and click on Find.
- Chrome will try to find harmful software if any.

On a Mac, you’ll need third-party tools for this process.
11. Use a more efficient browser
If you’ve tried everything and Chrome still keeps using all system resources, maybe it’s time to ditch Chrome and go for a better browser. And if you’re going for a more efficient browser, make sure it’s secure as well so it can be a win-win. For example, the Kingpin browser can be a good choice. It is efficient, doesn’t contain extensions, and doesn’t store cookies and history. It’s a completely secure browser that always works in incognito.
Conclusion
Chrome is the most popular browser but it comes with its own pitfalls. The browser eats simply too many system resources. While there are several ways to ensure Chrome doesn’t take up a lot of CPU and RAM, sometimes, nothing works. In such cases, all you can do is switch to a better browser.

